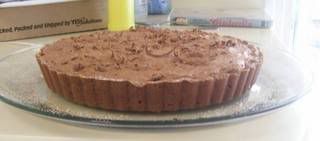
1 c sugar
1/3 c shortening
1 egg
1/2 c molasses
2 t soda
4 T hot water
1 t cinnamon
1 t ginger
1 t salt
3 1/4 c plain flour

Cream sugar and shortening.  Thoroughly mix in egg and molasses.
Dissolve soda in hot water.  Sift dry ingredients together and add
alternately with soda water to creamed mixture.  Spread on greased cookie
sheet.  Bake 15 - 20 minutes in a 350 oven.  Cool, frost with powdered
sugar or leave plain.  Cut into squares or bars as desired.
Wednesday, December 5, 2007
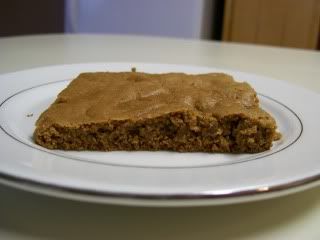
Soft Gingerbread
Monday, November 26, 2007
Tender Potato Bread


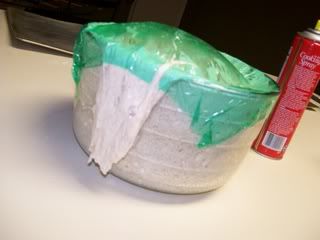
Coming out of the oven, just caught it, almost had an I love lucy moment!
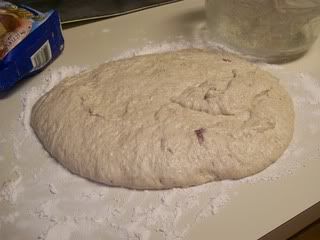
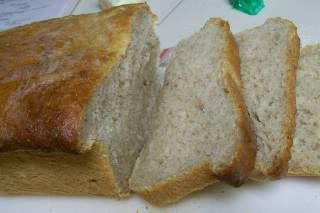
The loaf of bread.
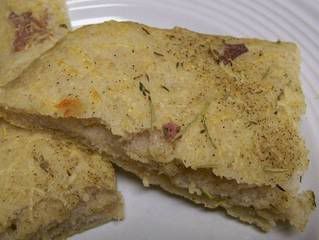 Foccacia bread, mmmmmm
(from Home Baking: The Artful Mix of Flour & Tradition Around the World by Jeffrey Alford and Naomi Duguid; who also wrote Hot Sour Salty Sweet)
Makes 1 large tender-crumbed pan loaf AND something more; one 10X15 inch crusty yet tender foccacia, 12 soft dinner rolls, or a small pan loaf
Suggested Toppings:
For Loaves and Rolls: melted butter (optional)
For Foccacia: olive oil, coarse salt, and rosemary leaves (optional; also see variation)
For Anchovy-Onion Focaccia: Instead of oil, salt, and rosemary, top with onions slow-cooked in olive oil or bacon fat, a scattering of chopped anchovy fillets, and flat-leafed parsley leaves.
Alternate fillings, seasons, shapes are up to you.
Potatoes and potato water give this bread wonderful flavor and texture. The dough is very soft and moist and might feel a little scary if you’ve never handled soft dough before. But don’t worry: Leaving it on parchment or wax paper to proof and to bake makes it easy to handle.
4 medium to large floury (baking) potatoes, peeled and cut into chunks.
Tanna Note: For the beginner bread baker I suggest no more than 8 ounces of potato; for the more advanced no more than 16 ounces. The variety of potatoes you might want to use would include Idaho, Russet & Yukon gold, there are others.
1 tablespoon plus 1 teaspoon salt
2 teaspoons active dry yeast
6 ½ cups to 8 ½ cups (1 kg to 1350g) unbleached all-purpose
1 tablespoon unsalted butter, softened
1 cup (130g) whole wheat flour
Put the potatoes and 4 cups water in a sauce pan and bring to boil. Add 1 teaspoon salt and cook, half covered, until the potatoes are very tender.
Drain the potatoes, SAVE THE POTATO WATER, and mash the potatoes well. Tanna Note: I have a food mill I will run my potatoes through to mash them.
Note about Adding Yeast: If using Active Dry Yeast or Fresh yeast, mix & stir yeast into cooled water and mashed potatoes & water and let stand 5 minutes. Then add 2 cups of flour to the yeast mix and allow to rest several minutes.
Sprinkle in the remaining 1 tablespoon salt and the softened butter; mix well. Add the 1 cup whole wheat flour, stir briefly.
Tanna Note: It is at this point you are requested to Unleash the Daring Baker within. The following is as the recipe is written. You are now free to follow as written or push it to a new level.
To shape the large loaf:
Butter a 9 x 5 x 2.5 inch loaf/bread pan. Flatten the larger piece of dough on the floured surface to an approximate 12 x 8 inch oval, then roll it up from a narrow end to form a loaf. Pinch the seam closed and gently place seam side down in the buttered pan. The dough should come about three-quarters of the way up the sides of the pan. Cover with plastic wrap and let rise for 35 to 45 minutes, until puffy and almost doubled in volume.
Butter an 8x4X2 inch bread pan. Shape and proof the loaf the same way as the large loaf.
Butter a 13 x 9 inch sheet cake pan or a shallow cake pan. Cut the dough into 12 equal pieces. Shape each into a ball under the palm of your floured hand and place on the baking sheet, leaving 1/2 inch between the balls. Cover with plastic wrap and let rise for about 35 minutes, until puffy and almost doubled.
Flatten out the dough to a rectangle about 10 x 15 inches with your palms and fingertips. Tear off a piece of parchment paper or wax paper a little longer than the dough and dust it generously with flour. Transfer the focaccia to the paper. Brush the top of the dough generously with olive oil, sprinkle on a little coarse sea salt, as well as some rosemary leaves, if you wish and then finally dimple all over with your fingertips. Cover with plastic and let rise for 20 minutes.
Baking the bread(s):
Note about cooling times: Let all the breads cool on a rack for at least 30 minutes before slicing. Rolls can be served warm or at room temperature.
Dust risen loaves and rolls with a little all-purpose flour or lightly brush the tops with a little melted butter or olive oil (the butter will give a golden/browned crust). Slash loaves crosswise two or three times with a razor blade or very sharp knife and immediately place on the stone, tiles or baking sheet in the oven. Place the rolls next to the loaf in the oven.
Bake rolls until golden, about 30 minutes. Bake the small loaf for about 40 minutes. Bake the large loaf for about 50 minutes.
Place a baking stone or unglazed quarry tiles, if you have them, if not use a no edged baking/sheet (you want to be able to slide the shaped dough on the parchment paper onto the stone or baking sheet and an edge complicates things). Place the stone or cookie sheet on a rack in the center of the oven and preheat to 450°F/230°C.
If making foccacia, just before baking, dimple the bread all over again with your fingertips. Leaving it on the paper, transfer to the hot baking stone, tiles or baking sheet. Bake until golden, about 10 minutes. Transfer to a rack (remove paper) and let cool at least 10 minutes before serving.
Saturday, November 10, 2007
The BEST pie crust,ever!!!
Basic Flaky Pie Crust
- 1 1/4 cups all-purpose flour
- 1/4 teaspoon salt
- 1/2 cup shortening, chilled
- 3 tablespoons ice water
- Whisk the flour and salt together in a medium size bowl. With a pastry blender, cut in the cold shortening until the mixture resembles coarse crumbs. Drizzle 2 to 3 tablespoons ice water over flour. Toss mixture with a fork to moisten, adding more water a few drops at a time until the dough comes together.
- Gently gather dough particles together into a ball. Wrap in plastic wrap, and chill for at least 30 minutes before rolling.
- Roll out dough, and put in a pie plate. Fill with desired filling and bake.
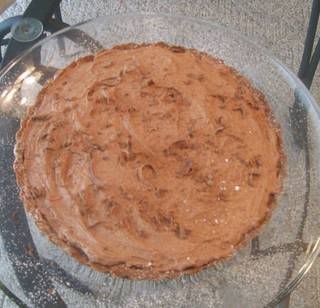
Nutella Truffles
Nutella Truffles
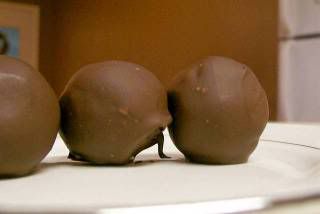
These are soooo good. They are like peanut butter balls, or buckeyes that everyone makes for christmas, just a different twist on the idea. They are extremely easy to make, took no time at all, other than the chilling time. Make sure to use cinnamon graham crackers because the cinnamon adds a different depth to the balls. I think I'm now addicted to Nutella!! Pictures will be coming later :)
Sorry for the bad pics, but it gives you an idea :)

1 1/2 cups of Nutella
24 cinnamon graham cracker squares, crushed
1 cup powdered sugar
1 T whipping cream
12 ounces semisweet baking chocolate, chopped
2 tsp shortening
2 T finely chopped toasted hazelnuts *optional
1. Line a baking sheet with waxed paper, set aside. Beat chocolate-hazelnut spread and crushed graham crackers in a large mixing bowl with an electric mixer on medium speed until combined. Gradually stir in powdered sugar. Stir in whipping cream to make a stiff mixture. Shape mixture into 1-inch balls; place balls on prepared baking sheet. Chill for 1 hour.
2. Cook and stir chocolate and shortening in a medium saucepan over low heat until melted and smooth.
Remove from heat. Quickly dip balls, one at a time, into melted chocolate using a fork. Draw the fork across the rim of the saucepan to remove excess chocolate. Place candy on the baking sheet lined with waxed paper. If desired, sprinkle with hazelnuts. Chill for about 2 hour or until set. Makes 54
To store: Place candy in a single layer in an airtight container; cover. Refrigerate for up to 2 weeks.
Sunday, September 2, 2007
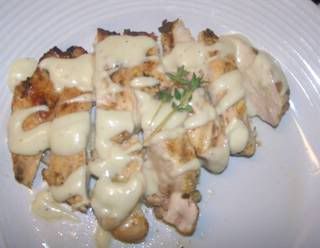
Pork with Gorgonzola Sauce
Pork
1/4 cup Dijon mustard
1 tablespoon olive oil
1 tablespoon dried thyme
2 3/4-pound pork tenderloins
Gorgonzola sauce
1 tablespoon butter
1 tablespoon all purpose flour
1 cup whipping cream
1/4 cup white cooking wine
1/4 cup canned low-salt chicken broth
1 cup crumbled Gorgonzola cheese (about 4 ounces)
Preheat oven to 425°F. Roast pork until thermometer inserted into thickest part of meat registers 150°F, about 30 minutes. Remove from oven and let stand 5 minutes.
Meanwhile, prepare sauce: Melt 1 tablespoon butter in heavy small saucepan over medium heat. Add 1 tablespoon flour and whisk 1 minute. Gradually whisk in whipping cream, white wine and chicken broth. Boil until mixture is thick enough to coat spoon, whisking frequently, about 1 minute. Add crumbled Gorgonzola and whisk until cheese is melted and smooth and sauce is reduced to desired consistency, about 5 minutes.
Slice pork and transfer to plates. Ladle some sauce over pork. Serve, passing additional sauce separately.
Makes 6 servings.Spicy Shrimp with Andouille Sausage on Grits
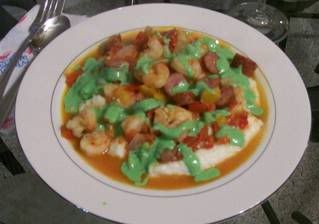
This recipe is wonderful. I have made it twice now, once for our anniversary dinner and once for us and a friend. Ignore the amount of fat in it, it is seriously wonderful. The green sauce is THE HOTTEST STUFF I HAVE EVER TASTED. I can handle anything spicy, this I could not eat. My husband LOVED it. A cajun friend said this stuff was HOT. So, if you make it, taste a drop before adding to your plate. The first time I made it I used kielbasa sausage because (as stated in a previous post) I could not find andouille sausage, but if you can find it, use it. It makes it much better.
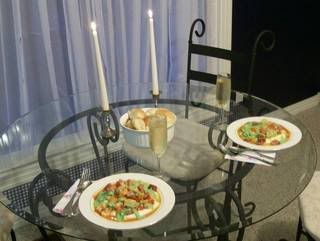
Our table set for our anniversary dinner, awwww :) *disclaimer* We do not drink alcoholic drinks, that is sparking white grape juice :)
Spicy Shrimp with Andouille Sausage on Grits
from epicurious.com
Ingredients
1/3 cup green hot pepper sauce
1/4 cup white cooking wine
1 shallot, chopped
1 tablespoon fresh lemon juice
1 tablespoon rice vinegar
1 cup whipping cream
5 cups water
3 cups whole milk
1/4 cup (1/2 stick) unsalted butter
2 cups corn grits*
1/4 cup olive oil
8 ounces smoked andouille sausage,** sliced
1 red bell pepper, chopped
1 yellow bell pepper, chopped
1/2 cup minced onion
4 garlic cloves, chopped
30 uncooked large shrimp, peeled, deveined
4 plum tomatoes, chopped
1 teaspoon Cajun seasoning
1 teaspoon Old Bay seasoning
Bring 1/2 cup cream, 5 cups water, milk and butter to simmer in heavy medium saucepan. Gradually whisk in grits. Simmer until grits are very soft and thickened, stirring frequently, about 1 hour.
Meanwhile, heat olive oil in heavy medium skillet over medium heat. Add sausage, both bell peppers, onion and garlic; sauté until vegetables are tender, about 8 minutes. Add shrimp, tomatoes, Cajun seasoning and Old Bay seasoning and sauté until shrimp are opaque in center, about 6 minutes. Season to taste with salt and pepper.
Bring hot pepper-cream sauce to simmer. Spoon grits onto 6 plates, dividing equally. Spoon shrimp mixture over grits. Drizzle hot pepper-cream sauce over and serve.
*Corn grits, also known as polenta, are available at Italian markets, natural foods stores and some supermarkets. If unavailable, substitute 2 cups regular yellow cornmeal, and cook about 30 minutes.
**A smoked pork-and-beef sausage available at specialty foods stores. Smoked bratwurst, kielbasa or smoked Hungarian sausage can be substituted.Baked Brie with Caramelized Onions on French Bread
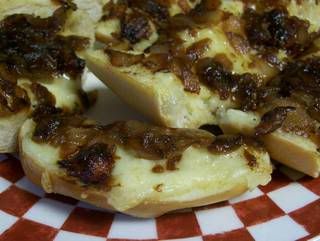
Baked Brie with Caramelized Onions on French Bread
One half of a loaf french bread, sliced in half lengthways
butter for spreading
2T. butter
2 large onions, sliced
1/4 tsp thyme
2 garlic cloves, chopped
1/4 cup white cooking wine
1tsp sugar
8 ounce brie
Melt butter in heavy very large skillet over medium-high heat. Add onions; sauté until just tender, about 6 minutes. Add thyme, reduce heat to medium and cook until onions are golden, stirring often, about 25 minutes. Add garlic and sauté 2 minutes. Add 2 T wine; stir until almost all liquid evaporates, about 2 minutes. Sprinkle sugar over onions and sauté until soft and brown, about 10 minutes. Add remaining 2 T wine; stir just until liquid evaporates, about 2 minutes. Season to taste with salt and pepper. Cool. (Can be prepare 2 days ahead. Cover and refrigerate.)
Preheat oven to 350. Prepare brie and soften until able to spread. Spread french bread lightly with butter, spread with brie, top with caramelized onions. Bake in oven until brie is melted and bread is lightly brown on edges.
Andouille Sausage, Apple and Pecan Dressing
Andouille Sausage, Apple and Pecan Dressing. Sounds good, yes? This is loosely based from a recipe from Southern Living, I just added my own tweaks. I liked it, my husband LOVED it and at least one lady from church loved it.
I didn't take any pictures of this because dressing is something really hard to take pics of and make it look appetizing! Andouille sausage is a spiced, heavily smoked, pork, cajun/Louisiana sausage, when I lived in TN I could not find it anywhere. Here in Louisiana we have several brands to choose from :)
Andouille Sausage, Apple and Pecan Dressing
Ingredients
1/2 c. butter or margarine, divided + 2T
1 1/2 cups white cornmeal
1/2 cup all purpose flour
1 T sugar
1 tsp. baking powder
3/4 tsp salt
1/2 tsp baking soda
4 eggs, divided
1 1/2 cups buttermilk
3 cups frozen Garlic bread, thawed and cubed
1 onion, chopped
1 cup celery, diced
1 T. Sage
1 T. pepper
Chicken broth, about 2 cans, maybe more
3/4 pound diced, Andouille sausage
2 Granny Smith apples, diced
1 cup chopped toasted pecans
Place 1/4 cup butter in a 8 inch pan; heat in oven at 425° for 4 minutes.
Combine cornmeal and next 5 ingredients; whisk in 2 eggs and buttermilk.
Pour hot butter into batter, stirring until blended. Pour batter into pan.
Bake at 425° for 30 minutes or until golden brown. Cool.
Crumble cornbread into a large bowl; stir in garlic bread, and set aside.
Melt remaining 1/4 cup butter in a large skillet over medium heat; add onions and celery, and sauté until tender. Stir in sage, and sauté 1 more minute. Set aside, melt 2 T of butter in skillet and saute apple until tender.
Brown Andouille sausage in a skillet over medium heat; drain.
Stir vegetables, remaining 2 eggs, chicken broth, and pepper into cornbread mixture. Add sausage, Granny Smith apples, and pecans into cornbread mixture; pour evenly into 1 lightly greased 13- x 9-inch baking dish. Cover and chill 8 hours.
Bake, uncovered at 375° for 40 to 45 minutes or until done.
Sunday, July 29, 2007
Low Fat Chocolate Banana Bread
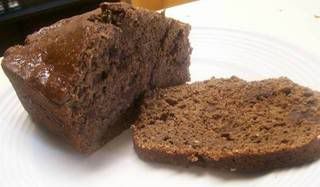
This is a really yummy banana bread. It's great hot, right out of the oven and I love banana bread with butter on it. (not low fat anymore, but oh well!!) It would probably be good with walnuts added.
Ingredients:
3/4 cup sugar
2 eggs
1/4 cup vegetable oil
1/4 cup applesauce
1 tsp. vanilla extract
1 1/2 cups all-purpose flour
1/2 cup unsweetened cocoa
1 tsp. baking soda
2 large mashed bananas
1/2 cup chocolate chips
DIRECTIONS
Preheat oven to 350 degrees. Spray the bottom of an 8-inch loaf pan with nonstick spray.
In a large bowl, beat the sugar, eggs, oil and applesauce at medium speed until mixed (use an electric mixer or stand mixer). Beat in vanilla. In a medium bowl, stir together the flour, cocoa, and baking soda; beat into sugar mixture at low speed just until combined. Stir in bananas and chocolate chips.
3. Spoon batter into loaf pan. Bake 60-70 minutes. Cool 10 minutes then remove from pan. Cool completely on wire rack.
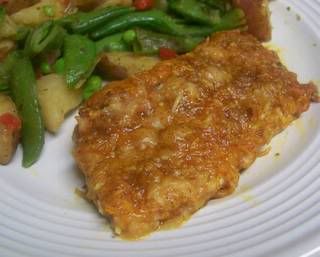
Parmesan-Paprika Chicken
1/2 teaspoon black pepper
1 egg, beaten
2 tablespoons milk
Hot sauce
2 boneless chicken breasts, pounded thin
2 T. butter, melted
Preheat oven to 350 degrees F (175 degrees C). Coat a shallow baking dish with nonstick cooking spray.
Combine flour, Parmesan, paprika, garlic,cayenne, and pepper in a bowl. In a separate bowl, whisk together the egg, hot sauce and milk.
Dip the chicken in the egg, then dredge in the flour mixture. Place in the baking dish, and pour the melted butter evenly over the chicken.
Bake for about 25-30min to an hour in the preheated oven, until the cheese has browned, and the chicken has cooked.
Tuesday, July 3, 2007
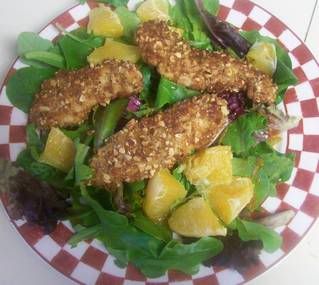
Almond-crusted chicken tender salad
Next time, I will try baking the chicken tenders instead of frying them :) Also, I could not find Panko bread crumbs, so I just toasted whole wheat bread and then put in a food processor to make crumbs.
Almond-crusted chicken tender salad
Dressing ingedients
1/4 cup Kikkoman Teriyaki Marinade and Sauce
1/4 cup olive oil
2T honey
2T vinegar
1tsp freshly grated orange peel
Salad ingredients
1 lb chicken breast tenders
freshly ground black pepper
1 egg
1T kikkoman Teriyaki marinade and Sauce
1/2 cup all purpse flour
1/2 cup Kikkoman Panko bread crumbs
1/2 cup smoked almonds, finely chopped
3 T vegetable oil
6 cups mixed baby salad greens
2 oranges, peeled and cut into segments
Orange-teriyaki-honey dressing
Whisk together teriyaki sauce, olive oil, honey vinegar and orange peel.
Chicken salad
1. Season chicken tenders with pepper. Beat egg with teriyaki sauce in shallow bowl until well blended.
2. Place flour in shallow dish. Combine bread crumbs and almonds in another shallow dish.
3. Dust both sides of chicken with flour, then dip into egg mixture and finally coat with almond mixture.
4. In 12-inch skillet, heat 2 T oil over med-high heat. Add chicken and cook 6 to 7 minutes, or until no longer pink in center, turning over once and adding more oil as needed.
5. Divide salad greens among 4 dinner plates. Arrange chicken and orange segments on greens. Serve with teriyaki-honey dressing
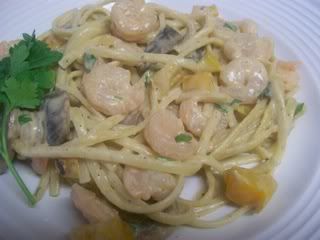
Creamy Cajun Shrimp Linguine
The only changes I made was I used small shrimp, ones that were frozen and already cooked. I used a yellow bell pepper. I cooked the vegetables with a tad bit of butter and set aside, than made the sauce(with a little bit more creamer) and after it had thickened added the vegetables. Next time, I will not add the parsley, I just can not make myself like the way it tastes!
Ingredients
Preparation
Combine 1 cup water and broth in a Dutch oven; bring to a boil. Break pasta in half; add to pan. Bring mixture to a boil. Cover, reduce heat, and simmer for 8 minutes. Add shrimp to pan. Cover and simmer for 3 minutes or until shrimp are done; drain.Melt butter in a large skillet over medium-high heat. Add mushrooms and pepper to pan; sauté 4 minutes or until moisture evaporates. Add flour and seasoning to pan; sauté 30 seconds. Stir in half-and-half; cook 1 minute or until thick, stirring constantly. Remove from heat. Add pasta mixture and parsley to pan; toss.
Yield
4 servings (serving size: 1 1/2 cups)
Nutritional Information
CALORIES 365(27% from fat); FAT 10.9g (sat 5.9g,mono 2.7g,poly 0.8g); PROTEIN 27.4g; CHOLESTEROL 194mg; CALCIUM 101mg; SODIUM 685mg; FIBER 2.2g; IRON 4.1mg; CARBOHYDRATE 38.1g
Sunday, June 3, 2007
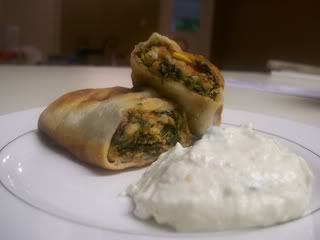
Southwestern Egg Rolls
- 2 tablespoons vegetable oil
- 1 skinless, boneless chicken breast half
- 2 tablespoons minced green onion
- 2 tablespoons minced red bell pepper
- 1/3 cup frozen corn kernels
- 1/4 cup black beans, rinsed and drained
- 2 tablespoons frozen chopped spinach, thawed and drained
- 2 tablespoons diced jalapeno peppers
- 1/2 tablespoon minced fresh parsley
- 1/2 teaspoon ground cumin
- 1/2 teaspoon chili powder
- 1/3 teaspoon salt
- 1 pinch ground cayenne pepper
- 3/4 cup shredded Monterey Jack cheese
- 5 (6 inch) flour tortillas
- 1 quart oil for deep frying
DIRECTIONS
- Rub 1 tablespoon vegetable oil over chicken breast. In a medium saucepan over medium heat, cook chicken approximately 5 minutes per side, until meat is no longer pink and juices run clear. Remove from heat and set aside.
- Heat remaining 1 tablespoon vegetable oil in a medium saucepan over medium heat. Stir in green onion and red pepper. Cook and stir 5 minutes, until tender.
- Dice chicken and mix into the pan with onion and red pepper. Mix in corn, black beans, spinach, jalapeno peppers, parsley, cumin, chili powder, salt and cayenne pepper. Cook and stir 5 minutes, until well blended and tender. Remove from heat and stir in Monterey Jack cheese so that it melts.
- Wrap tortillas with a clean, lightly moist cloth. Microwave on high approximately 1 minute, or until hot and pliable.
- Spoon even amounts of the mixture into each tortilla. Fold ends of tortillas, then roll tightly around mixture. Secure with toothpicks. Arrange in a medium dish, cover with plastic, and place in the freezer. Freeze at least 4 hours.
- In a large, deep skillet, heat oil for deep frying to 375 degrees F (190 degrees C). Deep fry frozen, stuffed tortillas 10 minutes each, or until dark golden brown. Drain on paper towels before serving.
- 1 (8 ounce) package cream cheese, softened
- 1 tablespoon sour cream
- 1 (7 ounce) can tomatillo salsa also called salsa verde
- 1 teaspoon freshly ground black pepper
- 1/4 tsp salt
- 1/2 teaspoon ground cumin
- 2 teaspoons garlic powder
- 1 bunch fresh cilantro, chopped
- 1 tablespoon fresh lime juice
DIRECTIONS
- Combine cream cheese, sour cream, salsa, pepper, celery salt, cumin, garlic powder, cilantro and lime juice in a blender or food processor. Blend until smooth and creamy. Place in a serving bowl.
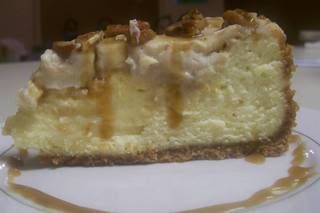
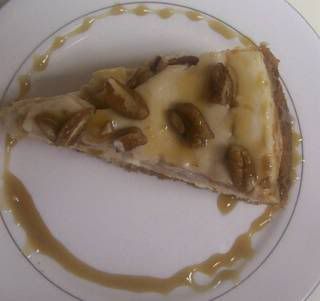
Praline Cheesecake
Praline Cheesecake
Crust:
1 1/2 cups graham cracker crumbs
4 tablespoons granulated sugar
1/4 cup (1/2 stick) melted butter
Filling:
3 (8-ounce) packages cream cheese, at room temperature
1 cup granulated sugar
5 eggs
1 tablespoon vanilla extract
Topping:
1 1/2 cups sour cream
4 tablespoons granulated sugar
1 teaspoon vanilla extract
Praline Sauce:
2 tablespoons light brown sugar
2 tablespoons cornstarch
1 cup dark corn syrup
1/2 cup chopped pecans
1 teaspoon vanilla extract
Preheat the oven to 350 degrees F.
For the crust, stir together the graham cracker crumbs, sugar, and butter. Pat this mixture into the bottom and sides of a 9-inch spring form pan.
Make the filling: In a large bowl, beat together the cream cheese and granulated sugar. Beat in the eggs, 1 at a time, and then beat in the vanilla. Pour the filling into the crust and bake for 1 hour. Remove the cake from the oven and cool for 10 minutes.
Meanwhile, make the topping: In a bowl, mix the sour cream, sugar, and vanilla until well blended. Spread this mixture over the warm cake and return to the oven for 4 minutes. Let the cake cool to room temperature in the pan, then cover with plastic wrap and refrigerate for at least 4 hours or overnight. At serving time, use a table knife to loosen the cake from the pan. Remove the sides of the pan and place the cake on a platter, leaving it on pan bottom. To make the praline sauce, in a small heavy saucepan stir together the brown sugar and cornstarch. Stir in the corn syrup and cook over medium heat, stirring constantly, until thick. Remove the pan from the heat and stir in the nuts and vanilla. Cool slightly. Serve the cheesecake, passing the sauce in a bowl with a small ladle. Store any leftovers in the refrigerator.
Tuesday, May 29, 2007
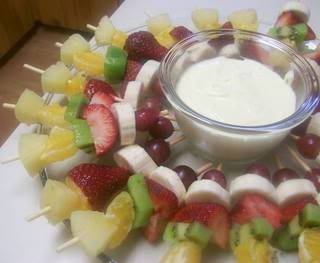
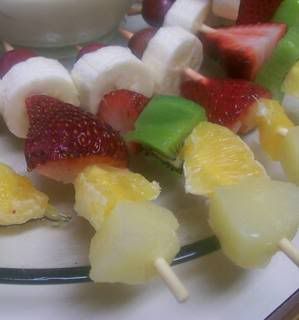
Fruit Kabobs
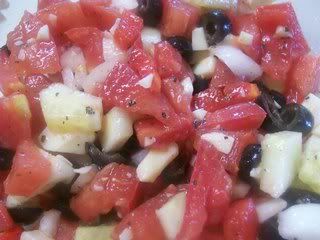
More tomatoes....
1 large tomato, chopped
1/4 white onion, diced
handful ripe olives
1/4 red bell pepper, diced
1/2 cucumber, diced
chunk of montery jack cheese
green onions, sliced
1/2 tsp. apple cider vinegar
1 T olive oil
dried basil
pepper
salt
Combine all ingredients, toss to coat, and refrigerate to let flavors meld. :)
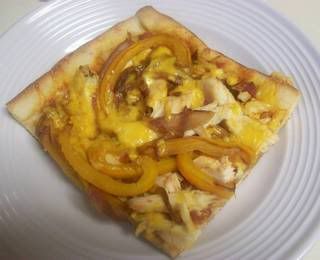
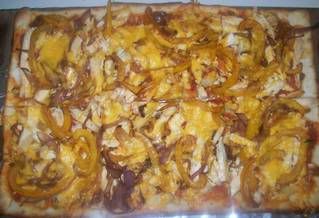
Spicy Chicken Pizza
SPICY CHICKEN PIZZA
2 tsp cooking oil
12 ounces skinless, boneless chicken breasts, cut into thin strips
1 medium sweet red bell pepper, cut into thin strips
1/2 medium red onion, thinly sliced
Nonstick cooking spray
1 10-ounce package refrigerated pizza dough
1/2 cup hot picante sauce
1/2 cup shredded sharp cheddar cheese
Preheat the oven to 400F. In a large nonstick skillet, heat cooking oil. Cook chicken strips in the oil over medium--high heat for about 5 minutes or until no longer pink. Remove from skillet. Add red pepper and onion; cook about 5 minutes, or until tender. Remove from skillet; set aside.
Coat a 15 by 10 by 1 inch baking pan with nonstick cooking spray. Unroll pizza dough in pan; press to form a 12 by 8 inch crust. Pinch edges of dough. (I just pressed it out to fit the pan)
Spread crust with picante sauce. Top with chicken and vegetables; sprinkle with cheddar cheese. Bake for 13 to 18 minutes, or until crust is brown and cheese is melted.
Thursday, May 24, 2007
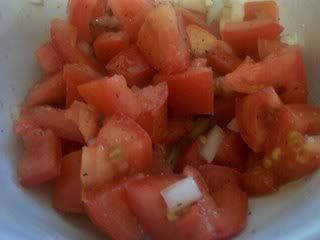
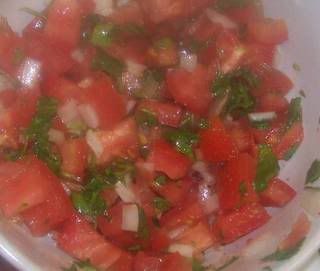
Tomatoe Salad
2 Roma tomatoes, sliced, chopped, and seeded
1/4 White onion, chopped
1 tsp. Olive oil
Salt
Pepper
2 T. Parsley, chopped
Combine tomatoes and onion in a bowl, drizzle on olive oil and sprinkle with salt and pepper. Toss to coat. Let sit in fridge while you cook the rest of the meal, or for a couple of hours. Serve with French bread to soak up all the juice and oil!
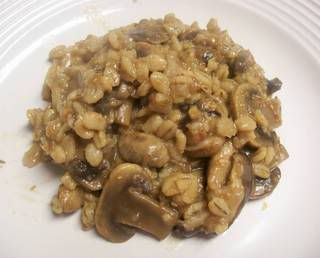
Mushroom Barley
1 T. margarine
1 (8-ounce) package presliced mushrooms
1 (3 1/2-ounce) package shiitake mushrooms, sliced
1 cup quick cooking barley
1 (1 ounce) envelope onion soup mix
2 1/2 cups water
Heat margarine in a medium nonstick skillet over medium-high heat. Add mushrooms; saute 5 mintues or until tender.
Combine barley, onion soup mix, water and mushrooms, in a saucepan. Cook over low heat until barley has absorbed all the water.
Garnish with chives, if desired.
Saturday, May 12, 2007
Healthy foods....
"It's a french pastry"
ingredients
1 1/4 cups water
1 1/2 sticks (3/4 cup) unsalted butter, cut into pieces
1/2 teaspoon salt
1 1/2 cups unbleached flour
4 to 6 large eggs
preparation
In a heavy saucepan bring water to a boil with butter and salt over high heat. Reduce heat to moderate. Add flour all at once and beat with a wooden spoon until mixture pulls away from sides of pan, forming a dough
Transfer dough to bowl of a standing electric mixer and beat in 4 eggs, 1 at a time, on high speed, beating well after each addition. Batter should be stiff enough to just hold soft peaks and fall softly from a spoon. If batter is too stiff, in a small bowl beat remaining 2 eggs lightly, 1 at a time, and add to batter, a little at a time, beating on high speed, until batter is desired consistency.
Chocolate Pastry Cream
ingredients
4 large egg yolks
1/4 cup sugar
3 tablespoons cornstarch
3 tablespoons unsweetened cocoa powder
1/4 teaspoon salt
1 cup milk
a 3-ounce bar fine-quality bittersweet chocolate (not unsweetened), broken into pieces
2 tablespoons unsalted butter, cut into bits and softened
Praline Powder
1/2 c. sugar
1/2 c. blanched almonds
Melt sugar over until caramel colored, stir in almonds. Pour into a buttered dish and let cool. Crush into a fine powder.
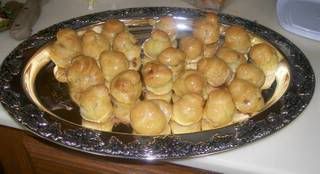
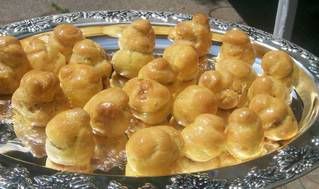
Chocolate Praline Croquembouche
ingredients
For cream puffs
1 recipe cream puff pastry
For filling
about 1 cup chocolate pastry cream
1/2 cup heavy cream
1/2 cup praline powder
For caramel
2 cups sugar
1/2 cup water
For assembly
large pastry bag
1/2-inch plain tip
1/4-inch plain tip
Note: a cake decorating turntable is helpful for assembling a croquembouche
preparation
Make cream puffs:Preheat oven to 425°F. and butter and flour 2 baking sheets.
Spoon pâte à chou into a large pastry bag fitted with a 1/2-inch plain tip and pipe about 55 mounds onto baking sheets, each about 1 1/2 inches in diameter, leaving 1 1/2 inches between mounds. With a finger dipped in water gently smooth pointed tip of each mound to round puffs. Bake puffs in upper third of oven 10 minutes, switching position of sheets in oven halfway through baking if necessary. Reduce temperature to 400°F. and bake puffs 20 minutes more, or until puffed and golden. Let puffs stand in turned-off oven 30 minutes. Transfer puffs to racks to cool. With a skewer poke a 1/4-inch hole in bottom of each puff. Puffs may be made 2 days ahead and kept in an airtight container. Recrisp puffs in 400°F. oven 5 minutes and cool before filling.
Make filling:
In bowl of a standing electric mixer beat pastry cream until just smooth and soft enough to fold in heavy cream (do not overbeat). In a chilled bowl with cleaned beaters beat heavy cream until it holds soft peaks and fold in praline powder. Fold whipped cream mixture into pastry cream. Chill filling, covered, about 1 hour, or until cold.
Fill cream puffs:
Transfer filling to a large pastry bag fitted with a 1/4-inch plain top and barely fill each puff (do not overfill), putting filled puffs in a shallow baking pan.
Make caramel:
In a heavy saucepan stir together sugar and water and bring to a boil over moderately low heat, stirring and washing down sides of pan with a brush dipped in cold water to dissolve any sugar crystals until sugar is dissolved. Boil syrup over moderately high heat, without stirring, until it begins to turn pale caramel. Still without stirring, gently swirl syrup in pan (so that it colors evenly) until it begins to turn golden caramel and remove from heat. Caramel will continue to color slightly off heat and will thicken as it cools. As caramel begins to reach thickness of corn syrup, return pan to a burner at lowest possible heat, using a flame-tamer if necessary, and keep warm (do not simmer).
Assemble croquembouche:
Line a tray with wax paper. Working quickly with 1 cream puff at a time, impale bottom of each puff on tip of a small serrated knife and carefully dip top in caramel, leaving bottom 1/3 inch uncoated (to facilitate handling) and letting excess drip off. (Be extremely careful when working with hot caramel.) Set puff, coated side up, on prepared tray. When all puffs are coated, center 3, touching to form a triangle, on a cake-decorating turntable. Form a ring of 9 puffs around triangle and, working with 1 of the 9 puffs at a time, carefully dip 1 edge into caramel, letting excess drip off, and affix puffs to one another in a tight ring around first 3 puffs. Dip bottom of a puff in caramel and center it over middle of first 3 puffs. Working with 1 puff at a time, carefully dip 1 edge of each puff into caramel, letting excess drip off, and build a second, slightly smaller ring on top of the first using 8 puffs (if necessary adding an additional puff in center to stabilize ring), making sure each puff is glued with caramel to the one before it.
Build on top of first 2 rows 4 more rings of 5 puffs each in same manner, always building from inside out with an additional puff in center as support.
For top of croquembouche build 1 layer of 3 puffs and top with 1 puff. Let caramel harden 5 minutes and loosen croquembouche from turntable with a spatula. Transfer croquembouche with hands to a platter.
Slip 5-inch-wide bands of wax paper under edges of croquembouche to protect from caramel drips. Remove caramel from heat and cool to thickness of molasses, 2 to 3 minutes. Dip tip of a small spoon in caramel and drizzle caramel decoratively over croquembouche. (Alternately, all puffs may be dipped in initial caramel and put in a shallow serving bowl without being molded into a cone shape.) Let caramel harden and remove wax paper. croquembouche is best served as soon as possible but may be made up to 12 hours ahead and chilled but not covered.
To serve croquembouche, lightly shatter caramel cage with back of a knife and dismantle, 1 puff at a time.
The only problems I had with this was (1) I could not get the praline powder to crush into a fine powder, so I had to keep cleaning out the tip when I was stuffing the puff. (2) I could not dip the puffs fast enough, I do not know how the creator of the recipe managed to dip all those puffs and fix them together and drizzle it over the top!! I had dipped about half of them when my carmel begin to harden and turn grainy. So, I had to wait to finish the rest until I had cleaned my pan and began the caramel process again!!
Tuesday, May 8, 2007
3/4 cup plus 2 tablespoons all purpose flour
2 tablespoons plus 2 teaspoons unsweetened cocoa powder (preferably Dutch process)
1/2 cup (1 stick) unsalted butter, room temperature
1/2 cup plus 2 tablespoons powdered sugar
1 large egg yolk
Filling
3 1/2 ounces high-quality milk chocolate (such as Lindt or Perugina), chopped
2 cups heavy whipping cream, divided
1/4 cup (1/2 stick) unsalted butter
1/2 cup plus 2 tablespoons sugar
3 tablespoons water
Unsweetened cocoa powder (for dusting)
Make crust
Whisk flour and cocoa in medium bowl. Beat butter and powdered sugar in another medium bowl until well blended. Beat in yolk. Add flour mixture in 2 additions, beating just until blended. Gather dough into ball; flatten into disk. Wrap in plastic and refrigerate 2 hours.
Divide dough into 6 equal pieces. Press each onto bottom and up sides of 4 1/2-inch-diameter tartlet pan with removable bottom. Refrigerate crusts 1 hour or freeze 30 minutes.
Preheat oven to 375°F. Bake cold crusts until set and dry-looking, about 12 minutes, pressing with back of spoon if bubbles form. Cool crusts in pans. DO AHEAD: Can be made 1 day ahead. Cover; store at room temperature.
Make filling:
Place milk chocolate in medium bowl. Bring 1 1/2 cups cream to simmer in small saucepan. Pour hot cream over chocolate; let stand 1 minute, then whisk until melted and smooth. Cover with plastic wrap and refrigerate until cold, at least 4 hours or overnight.
Combine remaining 1/2 cup cream and butter in small saucepan and stir over medium heat until butter melts; remove from heat. Combine sugar and 3 tablespoons water in heavy small saucepan. Stir over medium-low heat until sugar dissolves. Increase heat and boil without stirring until color is deep amber, occasionally brushing down sides of pan with wet pastry brush and swirling pan, about 8 minutes. Immediately add hot cream-butter mixture (mixture will bubble vigorously). Remove from heat and stir until any caramel bits dissolve. Transfer caramel to small bowl and chill until slightly firm (semi-soft), stirring often, about 40 minutes.
Spoon caramel into center of baked crusts (about 2 generous tablespoons for each crust). Set aside.
Using electric mixer, beat chilled milk chocolate-cream mixture until peaks form; spoon atop caramel in crusts, dividing equally (about 1/2 cup for each crust) and spreading evenly. Chill at least 2 hours. DO AHEAD: Can be made 8 hours ahead. Cover and keep refrigerated.
Remove tartlets from pans. Lightly sift cocoa powder over tartlets and serve.
